


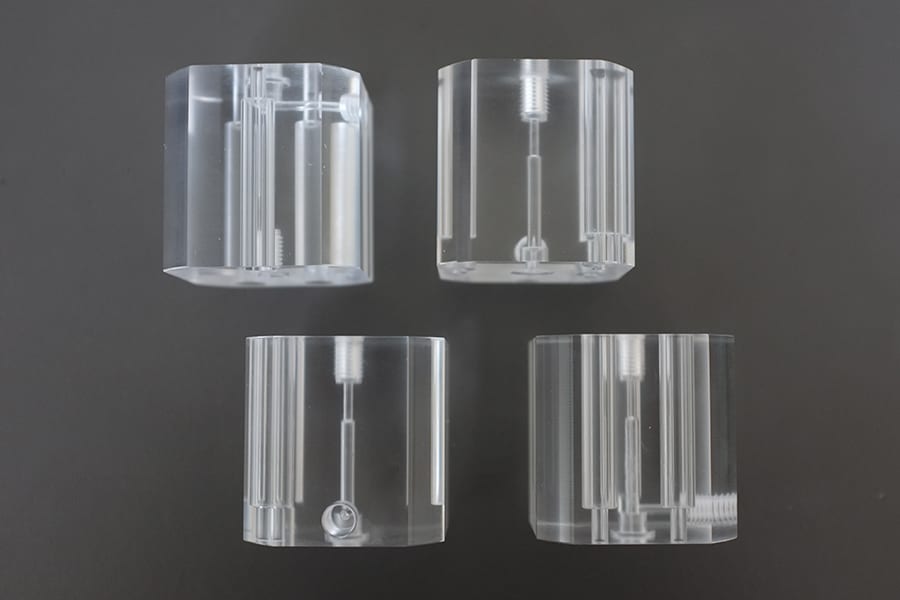
ส่วนประกอบพลาสติกและยางอาจออกจากแม่พิมพ์ ศูนย์เครื่องจักรกล หรือกระบวนการผลิตแบบเติมเนื้อพร้อมข้อบกพร่องหลายประเภท ครีบเส้นแบ่งแม่พิมพ์บางอาจหลุดออกได้ง่าย ในขณะที่เศษค้างจากเกตที่หนาอาจต้องใช้การตัดแบบควบคุม ขอบยางยืดหยุ่นอาจงอหนีวัสดุขัดแทนที่จะถูกกำจัดออก ชิ้นส่วนพลาสติกใสหรือพลาสติกที่ต้องการความสวยงามสูงอาจสูญเสียความใสก่อนที่ขอบส่วนเกินจะถูกกำจัดออก
ด้วยเหตุนี้ การเลือกอุปกรณ์ไม่ควรเริ่มจากคำถามว่า “เครื่องจักรใดสามารถกำจัดครีบพลาสติกได้?” แต่ควรเริ่มจากวัสดุ ข้อบกพร่อง รูปทรง ค่าความคลาดเคลื่อน ข้อกำหนดพื้นผิว และการสัมผัสที่ยอมรับได้ระหว่างชิ้นส่วน การตกแต่งแบบรวมกลุ่มสามารถประมวลผลชิ้นส่วนจำนวนมากได้อย่างมีประสิทธิภาพ แต่ควรทำหลังจากการทดลองขนาดเล็กยืนยันแล้วว่าข้อบกพร่องสามารถกำจัดได้โดยไม่ทำให้ลักษณะการใช้งานมนโค้งมน กักวัสดุขัด หรือทำให้เกิดฝ้าบนพื้นผิว
ระบุสิ่งที่ต้องกำจัดออกก่อน
คำว่า “ครีบ” มักถูกใช้เรียกสภาพที่แตกต่างกันหลายแบบ การระบุข้อบกพร่องอย่างถูกต้องช่วยป้องกันไม่ให้ใช้กระบวนการที่รุนแรงกับปัญหาที่ไม่ตรงกัน
| ข้อบกพร่อง | แหล่งกำเนิดโดยทั่วไป | ความเป็นไปได้ในการตกแต่งแบบรวมกลุ่ม | ความเสี่ยงหลัก |
|---|---|---|---|
| ครีบเส้นแบ่งแม่พิมพ์บาง | การฉีดขึ้นรูป การอัดขึ้นรูป หรือการขึ้นรูปแบบถ่ายโอน | มักเหมาะสมเมื่อครีบบางพอที่จะหลุดออกได้ | ครีบที่ยืดหยุ่นอาจพับแทนที่จะถูกตัดออก |
| เศษค้างจากเกต | การแยกทางวิ่งหรือเกต | เหมาะเฉพาะสำหรับรอยตกค้างขนาดเล็กหลังการกำจัดเกตหลัก | รอบการทำงานที่นานอาจทำให้พื้นผิวโดยรอบเป็นแอ่งหรือโค้งมน |
| ครีบจากการกลึง | การเจาะ การกัด การกลึง หรือการกัดขึ้นรูปพลาสติกวิศวกรรม | เป็นตัวเลือกที่ดีเมื่อขอบสามารถเข้าถึงได้ด้วยวัสดุขัด | รูสำคัญ เกลียว และขอบซีลอาจเปลี่ยนแปลงได้ |
| รอยชั้นหรือรอยค้ำยัน | กระบวนการ FDM, SLA, SLS หรือกระบวนการผลิตแบบเติมเนื้ออื่น ๆ | มีประโยชน์สำหรับการทำให้เรียบอย่างควบคุมหลังจากถอดส่วนค้ำยันแล้ว | รายละเอียดขนาดเล็กและผนังบางอาจถูกทำให้นิ่มลง |
| ครีบจากการขึ้นรูปยาง | โอริง ซีล ปะเก็น และชิ้นส่วนอีลาสโตเมอร์ที่ขึ้นรูป | เป็นไปได้เมื่อครีบเปราะหรือสามารถแยกออกด้วยวิธีทางกล | ขอบใช้งานและขอบที่นิ่มอาจเสียรูปหรือยังคงตกแต่งไม่เสร็จ |
เมื่อใดที่การตกแต่งแบบรวมกลุ่มเหมาะสม
กระบวนการแบบสั่น แบบถังหมุน หรือแบบแรงเหวี่ยงเหมาะที่สุดเมื่อชิ้นส่วนจำนวนมากสามารถเคลื่อนที่ได้อย่างอิสระร่วมกับวัสดุขัด และวัสดุที่ไม่ต้องการมีขนาดเล็กกว่าหรืออ่อนแอกว่าลักษณะสำคัญที่ต้องคงไว้ งานที่เหมาะสมมักมีลักษณะดังนี้:
- ชิ้นส่วนมีขนาดเล็กพอที่จะประมวลผลเป็นชุดที่ควบคุมได้
- ครีบหรือส่วนเกินมีขนาดเล็กและเข้าถึงได้จากภายนอก
- ยอมรับการสัมผัสของวัสดุขัดบนพื้นผิวที่มองเห็นและพื้นผิวใช้งานได้
- ขอบสามารถถูกทำให้โค้งมนเล็กน้อยโดยไม่เปลี่ยนประสิทธิภาพการประกอบ
- ชิ้นส่วนสามารถแยกออกจากวัสดุขัดได้โดยไม่เกิดการติดค้างหรือจำเป็นต้องคัดแยกด้วยมือ
- กระบวนการนี้มีเป้าหมายเพื่อการลบครีบ การทำให้เรียบ การทำความสะอาด หรือการเตรียมพื้นผิวที่ทำซ้ำได้สำหรับขั้นตอนการเคลือบหรือขัดเงาในภายหลัง
พลาสติกวิศวกรรม เช่น ABS ไนลอน อะซีทัล โพลีคาร์บอเนต และ PEEK อาจมีพฤติกรรมแตกต่างกันมาก แม้ว่าชิ้นส่วนจะมีรูปทรงเรขาคณิตคล้ายกันก็ตาม เกรดเรซิน สารเติมแต่ง ความชื้น ความหนาผนัง ความเค้นจากการขึ้นรูป และพื้นผิวเริ่มต้นล้วนส่งผลต่อผลลัพธ์ ชื่อวัสดุเพียงอย่างเดียวไม่เพียงพอที่จะกำหนดสูตรการทำงาน
เมื่อวิธีการลบครีบแบบอื่นปลอดภัยกว่า
ไม่ควรบังคับใช้การขัดแต่งผิวแบบรวมมวลกับชิ้นส่วนขึ้นรูปทุกชนิด ใช้วิธีการกำจัดหลักแบบอื่น หรือรวมหลายกระบวนการเข้าด้วยกัน เมื่อมีเงื่อนไขใดเงื่อนไขหนึ่งต่อไปนี้:
- เกตหรือทางวิ่งขนาดใหญ่:ใช้การหนีบ การตัดแต่ง การกัด หรือการตัดเพื่อกำจัดวัสดุส่วนเกินจำนวนมากก่อนการขัดแต่งผิว
- ครีบที่นิ่มมาก:ครีบจากอีลาสโตเมอร์ที่ยืดหยุ่นอาจต้องใช้การลบครีบด้วยความเย็นจัดหรือกระบวนการอื่นที่ทำให้วัสดุส่วนเกินแยกออกได้ง่ายขึ้น
- ขอบซีลที่สำคัญ:โอริง ไดอะแฟรม และซีลต้องผ่านการตรวจสอบความถูกต้องของรูปทรง ขนาด และประสิทธิภาพการรั่วซึมหลังการผ่านกระบวนการ
- คุณสมบัติช่องลึกที่เป็นช่องตัน:วัสดุขัดไม่สามารถกำจัดวัสดุในบริเวณที่เข้าไม่ถึง และวัสดุขัดที่ติดค้างอาจสร้างปัญหาในการผลิตที่ใหญ่ขึ้น
- พื้นผิวแบบออปติคัลหรือโปร่งใส:อาจเกิดฝ้าหรือรอยขีดข่วนละเอียดก่อนที่ข้อบกพร่องจะถูกกำจัด จำเป็นต้องใช้กระบวนการเฉพาะที่แบ่งเป็นขั้นตอน
- ชิ้นส่วนที่บางหรือยืดหยุ่นมาก:ชิ้นส่วนอาจซ้อนกัน เกี่ยวกัน หรือเสียรูปแทนที่จะเคลื่อนที่แยกจากกันอย่างอิสระ
เลือกเครื่องจักรตามพฤติกรรมของชิ้นส่วน
| กระบวนการ | เหมาะสำหรับ | สิ่งที่ต้องตรวจสอบ |
|---|---|---|
| เครื่องขัดสั่นแบบถ้วย | การลบครีบและทำให้เรียบเป็นชุดทั่วไปสำหรับชิ้นส่วนขนาดเล็กที่ขึ้นรูปหรือผ่านการกลึง | การหมุนเวียนของชิ้นส่วน การสัมผัสระหว่างชิ้นส่วนกับชิ้นส่วน ตะแกรงแยก และการติดค้างของวัสดุขัด |
| เครื่องขัดสั่นแบบถัง | ชิ้นส่วนยาว แบน หรือมีรูปทรงใช้งานยากที่ไม่หมุนเวียนได้ดีในถ้วย | การจัดวางแนวของชิ้นส่วน ตัวแบ่งห้อง และการสัมผัสระหว่างชิ้นส่วนยาว |
| การขัดแต่งแบบถังหมุน | การกลิ้งที่นุ่มนวลกว่าและการขัดเงาแบบแห้งหรือเปียกเป็นขั้นตอน | เวลารอบการทำงาน ความหนาแน่นในการบรรจุ ความร้อน และการสัมผัสอย่างสม่ำเสมอ |
| จานแรงเหวี่ยง | รอบการทำงานที่สั้นกว่าและมีพลังงานสูงกว่าสำหรับชิ้นส่วนขนาดเล็กที่แข็งแรง | แรงกระแทก การสูญเสียขอบ การเกิดความร้อน และการพันกันของชิ้นส่วน |
สำหรับการเปรียบเทียบที่กว้างขึ้นเกี่ยวกับการตัดสินใจเรื่องถ้วย ถัง ความจุ และขั้นตอนการทำงาน โปรดดูคู่มือการเลือกเครื่องขัดผิวแบบสั่นสะเทือนวิธีการที่เน้นรูปทรงเรขาคณิตเป็นหลักยังคงใช้ได้เช่นเดิม แต่ชิ้นส่วนพลาสติกและยางโดยทั่วไปต้องการการควบคุมความร้อน การสัมผัส และการเปลี่ยนแปลงขนาดที่เข้มงวดกว่า
การเลือกวัสดุขัด: อ่อนโยนไม่ได้หมายความว่าไม่มีประสิทธิภาพ
วัสดุขัดต้องมีความรุนแรงเพียงพอที่จะจัดการกับข้อบกพร่อง ขณะเดียวกันต้องปลอดภัยต่อวัสดุพื้นฐาน วัสดุขัดผิวพลาสติกที่มีความหนาแน่นต่ำมักถูกประเมินสำหรับชิ้นส่วนที่ไวต่อความเสียหาย เนื่องจากสามารถให้การตัดที่ควบคุมได้โดยมีแรงกระแทกน้อยกว่าวัสดุขัดเซรามิกที่มีความหนาแน่นสูง รูปร่างมีความสำคัญเท่ากับวัสดุ: รูปทรงกรวย พีระมิด สามเหลี่ยม ทรงกระบอก และรูปทรงพิเศษต่าง ๆ จะสัมผัสขอบและแยกออกจากรูหรือร่องแตกต่างกันวัสดุขัดผิวพลาสติกรูปทรงมีความสำคัญเท่ากับวัสดุ: รูปทรงกรวย พีระมิด สามเหลี่ยม ทรงกระบอก และรูปทรงพิเศษต่าง ๆ จะสัมผัสขอบและแยกออกจากรูและร่องแตกต่างกัน
อย่าเลือกวัสดุขัดโดยดูจากขนาดภายนอกของชิ้นส่วนเพียงอย่างเดียว ต้องวัดรูทะลุ รูตัน ร่อง ร่องเลนส์ พื้นที่ใต้ขอบ และช่องว่างระหว่างซี่โครง วัสดุขัดที่มีรูปทรงสามารถเข้าไปในคุณสมบัติบางอย่างได้อาจหมุนและติดล็อกอยู่ภายใน จุดเริ่มต้นที่ปลอดภัยที่สุดคือการทดสอบการติดค้างด้วยตัวอย่างขนาดเล็กของชิ้นส่วนทุกแบบ
ของเหลวผสมหรือของเหลวในกระบวนการยังส่งผลต่อการหล่อลื่น การทำความสะอาด การควบคุมความร้อน ฟอง คราบตกค้าง และวิธีที่วัสดุที่ถูกกำจัดออกจากชิ้นงานจะออกจากห้องทำงาน ควรตรวจสอบชิ้นส่วนโปร่งใสและชิ้นส่วนเพื่อความสวยงามหลังการล้างและทำให้แห้ง ไม่ใช่เฉพาะขณะเปียกเท่านั้น เนื่องจากน้ำสามารถบดบังรอยขีดข่วนละเอียดหรือความขุ่นมัวชั่วคราวได้

เวิร์กโฟลว์การพัฒนากระบวนการที่ปลอดภัย
- กำหนดข้อบกพร่องบันทึกความหนาของครีบ ความสูงของทางเข้าแม่พิมพ์ ตำแหน่งครีบ รอยบนพื้นผิว และคุณลักษณะใด ๆ ที่ต้องคงความคมชัดไว้
- บันทึกวัสดุระบุเกรดเรซินหรืออีลาสโตเมอร์ที่แน่นอน สารเติมแต่ง ความแข็งในกรณีที่เกี่ยวข้อง สี และชิ้นส่วนมีความโปร่งใสหรือจะชุบผิวภายหลังหรือไม่
- กำจัดวัสดุส่วนเกินจำนวนมากก่อนอย่าใช้รอบการขัดแต่งที่ยาวนานเพื่อทดแทนการตัดทางเข้าแม่พิมพ์หรือการตัดแต่งหนัก
- ทำการทดสอบการค้างของสื่อขัดตรวจสอบรู ช่อง ร่อง ส่วนตัดลึก และรูปทรงที่ซ้อนกันทุกจุดก่อนเดินงานเต็มชุด
- เริ่มต้นด้วยโหลดขนาดเล็กที่ควบคุมได้เก็บชิ้นส่วนอ้างอิงจากชุดที่ยังไม่ได้ผ่านการปรับสภาพ และเปลี่ยนตัวแปรทีละหนึ่งรายการ
- ตรวจสอบในช่วงเวลาสั้น ๆติดตามการกำจัดข้อบกพร่อง รัศมีขอบ ขนาด ความเงา สี อุณหภูมิ และรอยสัมผัสใหม่
- ตรวจสอบการแยกและการทำความสะอาดยืนยันว่า สื่อขัด ฝุ่น สารผสม และครีบที่หลุดออกสามารถถูกกำจัดออกได้อย่างสม่ำเสมอ
- ทำซ้ำสูตรที่ได้รับอนุมัติตรวจสอบความถูกต้องมากกว่าหนึ่งชุดก่อนขยายไปสู่ปริมาณการผลิตจริง
ปัญหาทั่วไปและแนวทางแก้ไข
| ผลลัพธ์ที่สังเกตได้ | แนวทางที่ควรตรวจสอบ |
|---|---|
| ครีบโค้งงอแต่ยังติดอยู่ | ครีบอาจมีความยืดหยุ่นมากเกินไปสำหรับแรงทางกลในปัจจุบัน ให้เปรียบเทียบการตัดแต่ง การพ่นขัด หรือการกำจัดครีบด้วยความเย็นจัด |
| ขอบมนก่อนที่รอยทางเข้าแม่พิมพ์จะหายไป | กำจัดส่วนของทางเข้าแม่พิมพ์ออกเพิ่มก่อนการขัดแต่ง ลดเวลารอบ หรือปรับลดความรุนแรงของสื่อขัด |
| เกิดฝ้าขาวหรือรอยขีดข่วนละเอียด | ตรวจสอบสภาพสื่อขัด การปนเปื้อน การเสียดสีแบบแห้ง ความร้อน สารผสม และการสัมผัสระหว่างชิ้นส่วน |
| ชิ้นส่วนติดกัน ซ้อนกัน หรือขัดแต่งไม่สม่ำเสมอ | ลดความหนาแน่นของการบรรจุ เปลี่ยนอัตราส่วนปริมาตรสื่อขัดต่อชิ้นส่วน ใช้ตัวแบ่ง หรือเลือกการเคลื่อนที่ของห้องทำงานแบบอื่น |
| สื่อขัดยังคงอยู่ในรูหรือร่อง | เปลี่ยนขนาดหรือรูปร่างของสื่อขัด และทำการทดสอบการค้างซ้ำก่อนการผลิต |
หากชุดงานเกิดรอยขีดข่วน คราบตกค้าง รอยบุบ หรือผลลัพธ์ไม่สม่ำเสมอ ให้ใช้วิธีควบคุมแบบเปลี่ยนตัวแปรทีละหนึ่งรายการ แทนที่จะเพิ่มเวลาทันที คู่มือการแก้ไขปัญหาการขัดแต่งแบบสั่นของเรามีขั้นตอนการวิเคราะห์อย่างเป็นระบบคู่มือการแก้ไขปัญหาการขัดแต่งแบบสั่นให้แนวทางการวินิจฉัยอย่างเป็นระบบ
ข้อมูลที่ต้องส่งสำหรับการทดลองกระบวนการ
คำแนะนำกระบวนการที่มีประโยชน์ต้องการมากกว่าภาพถ่ายชิ้นส่วน โปรดส่งข้อมูลต่อไปนี้พร้อมตัวอย่างที่ยังไม่ผ่านการปรับสภาพเมื่อเป็นไปได้:
- เกรดวัสดุหรือเรซิน/อีลาสโตเมอร์ที่แน่นอน และสารเติมแต่งใด ๆ;
- ขนาดชิ้นส่วน น้ำหนัก ความหนาผนัง และค่าความคลาดเคลื่อนที่สำคัญ;
- ภาพระยะใกล้ของครีบ ทางเข้าแม่พิมพ์ เสี้ยน แนวชั้น และคุณลักษณะที่ได้รับการปกป้อง;
- วิธีการกำจัดในปัจจุบันและเหตุผลที่ต้องปรับปรุง;
- ขอบเป้าหมาย ลักษณะพื้นผิว ความสะอาด และกระบวนการถัดไป;
- ปริมาณต่อชุด ปริมาณงานรายวัน เวลารอบการผลิตที่ยอมรับได้ และวิธีการแยกชิ้นงาน;
- วิธีการตรวจสอบ โดยเฉพาะสำหรับพื้นผิวซีล พื้นผิวออปติคัล พื้นผิวประกบ หรือพื้นผิวชุบเคลือบ
คำถามที่พบบ่อย
การขัดผิวแบบสั่นสะเทือนสามารถกำจัดครีบจากการฉีดขึ้นรูปได้หรือไม่?
สามารถกำจัดครีบขนาดเล็กที่เข้าถึงได้จากวัสดุและรูปทรงชิ้นงานที่เหมาะสมได้ ควรกำจัดทางฉีดขนาดใหญ่ก่อน และครีบที่มีความยืดหยุ่นอาจต้องใช้วิธีอื่น จำเป็นต้องมีการทดลองกับตัวอย่าง
สามารถกำจัดครีบจากโอริงยางด้วยเครื่องขัดผิวแบบรวมชิ้นงานได้หรือไม่?
ชิ้นส่วนยางบางชนิดสามารถกำจัดครีบด้วยวิธีเชิงกลได้ แต่ครีบอ่อนและรูปทรงซีลที่ทำหน้าที่สำคัญต้องใช้ความระมัดระวังเป็นพิเศษ การกำจัดครีบด้วยความเย็นจัดอาจเหมาะสมกว่าสำหรับอีลาสโตเมอร์บางประเภท ควรตรวจสอบขนาดและประสิทธิภาพการซีลหลังการแปรรูปเสมอ
วัสดุขัดชนิดใดปลอดภัยที่สุดสำหรับชิ้นส่วนพลาสติก?
ไม่มีวัสดุขัดที่ปลอดภัยที่สุดสำหรับทุกกรณี การเลือกที่ถูกต้องขึ้นอยู่กับเกรดเรซิน ข้อบกพร่อง ข้อกำหนดด้านพื้นผิว รูปทรง และความเสี่ยงที่วัสดุขัดจะติดค้าง วัสดุขัดพลาสติกความหนาแน่นต่ำมักได้รับการประเมินก่อนสำหรับชิ้นส่วนที่ไวต่อความเสียหาย แต่มีเพียงการทดสอบเท่านั้นที่สามารถยืนยันผลลัพธ์ได้
ทำไมชิ้นส่วนพลาสติกใสจึงขุ่นหลังการขัดผิว?
สาเหตุทั่วไป ได้แก่ วัสดุขัดที่รุนแรงเกินไป วัสดุขัดที่ปนเปื้อน การเสียดสีหรือความร้อนมากเกินไป การสัมผัสกันระหว่างชิ้นงาน สารตกค้าง และวิธีการทำให้แห้งที่ไม่เหมาะสม ดูคู่มือของเราเกี่ยวกับ การขัดชิ้นส่วนอะคริลิกโดยไม่ทำให้เกิดฝ้าหรือรอยไหม้ที่ขอบ
ควรทดสอบทั้งชุดการผลิตก่อนหรือไม่?
ไม่ควร เริ่มต้นด้วยตัวอย่างที่เป็นตัวแทนและเก็บชิ้นงานอ้างอิงที่ยังไม่ผ่านการแปรรูป ยืนยันการกำจัดข้อบกพร่อง ความคงที่ของขนาด ลักษณะภายนอก การทำความสะอาด การแยกชิ้นงาน และประสิทธิภาพการทำงานก่อนเพิ่มปริมาณการผลิต
อุปกรณ์และแหล่งข้อมูลกระบวนการที่เกี่ยวข้อง
ทดสอบชิ้นส่วนก่อนเลือกกระบวนการ
ส่งเกรดวัสดุ รูปภาพชิ้นส่วน ขนาด ภาพระยะใกล้ของข้อบกพร่อง คุณสมบัติที่ต้องปกป้อง ผิวสำเร็จเป้าหมาย และปริมาณต่อชุดของคุณ ทีมงานของเราสามารถช่วยเปรียบเทียบการขัดผิวแบบรวมชิ้นงานกับวิธีกำจัดครีบอื่น ๆ และกำหนดการทดสอบตัวอย่างที่มีการควบคุมได้
 +86-592-2381506


 รองรับเครือข่าย IPv6